Five Important Software Tools for Podcasters
Five important software tools for podcasters.
This week we provide you with a step-by-step guide on how to write a 1,000-word blog post in under 30 minutes by recording instead of typing.
Last week we talked about why podcasters should record, not type their blog posts.
One of the main reasons we discussed was that podcasters aren't writers they’re speakers, so recording a blog post is a more natural process. We also mentioned that recording saves you time, you can create content anywhere, it's more conversational in tone and it prevents you from pre-editing whilst you write.
This week we provide you with a step-by-step guide on how to write a 1,000 word blog post in under 30 minutes by recording instead of typing.
It is always advised to jot down an outline of what you want to discuss.
For example for this blog post, which I recorded, I just jotted down the key steps and that was it. For a different type of blog post you may want to write down the key points you want to get across.
You don’t need to spend a lot of time on your outline but having a rough idea of what you plan to say will help the editing process later.
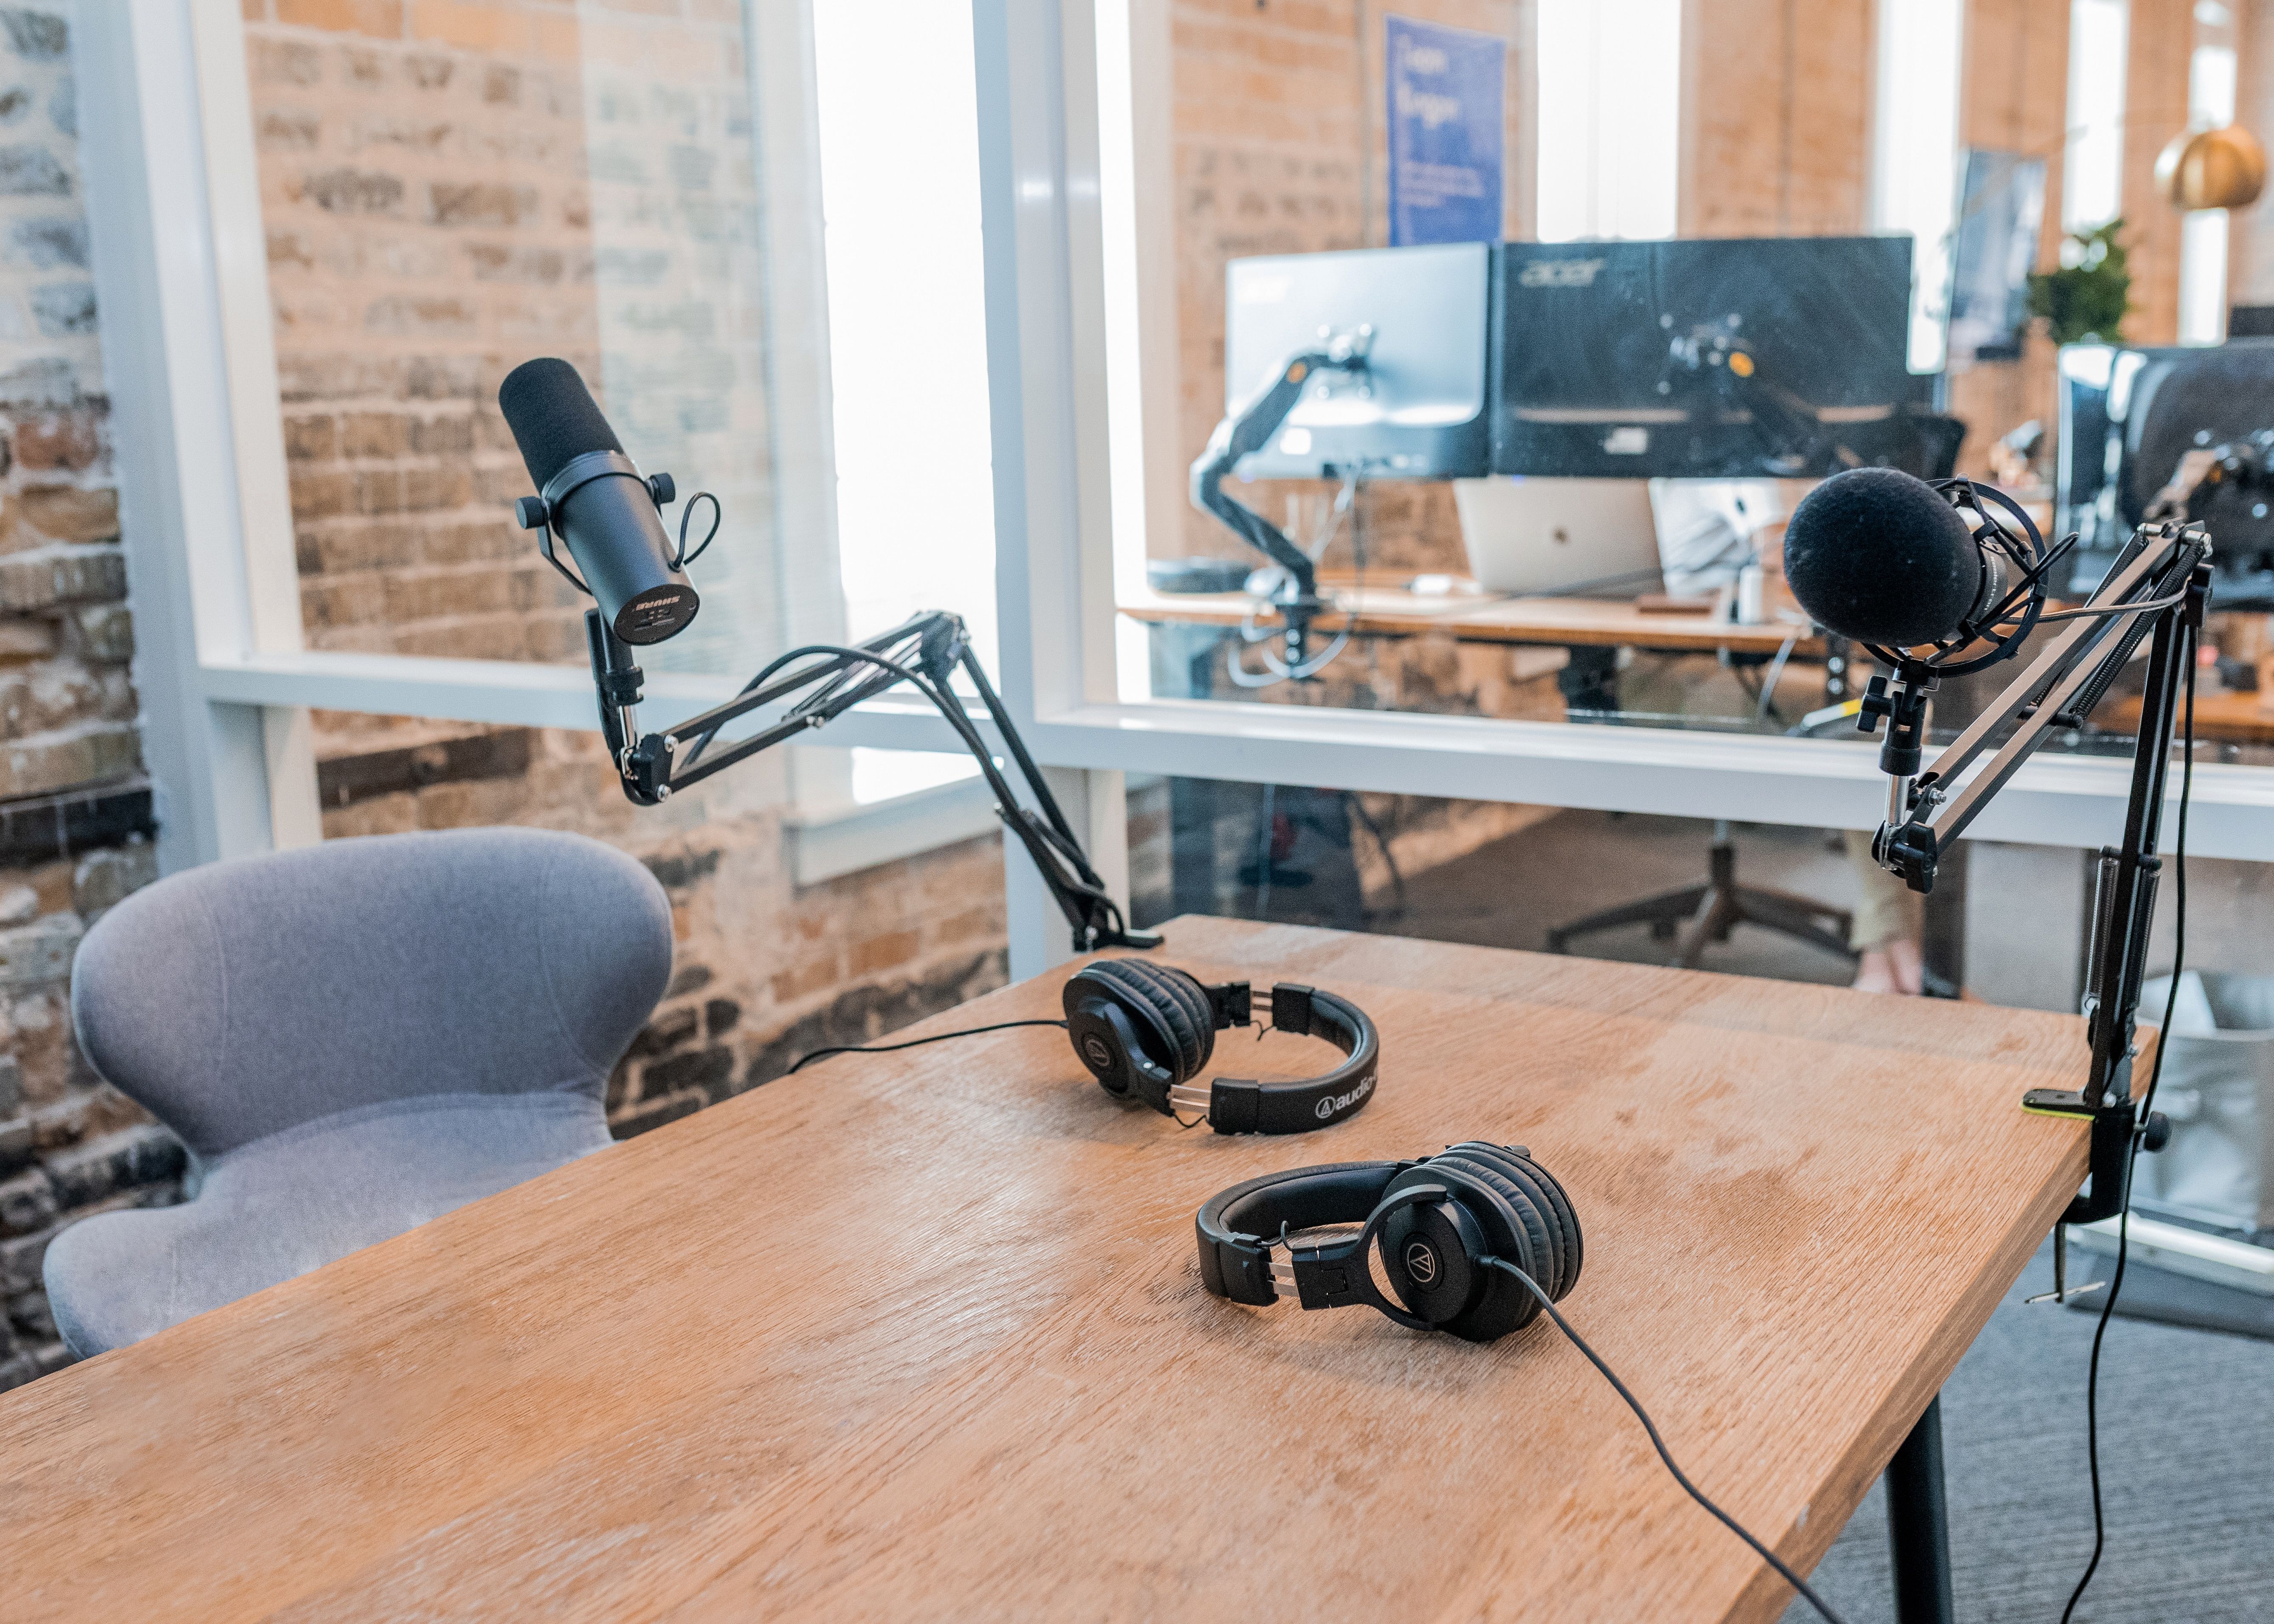
The first step in recording your blog post is to use good recording equipment.
You could probably get away with using your smartphone as a recording device if you are recording in your home, with no background noise, and the built-in microphone is close to your mouth. However, a handheld digital recorder has better functions to help you reduce background noise, and monitor audio levels. The result is superior stereo depth recording, which will lead to a higher accuracy rate of your automatic transcription.
Even with using a handheld recorder, you need to be mindful of background noise where you are recording. I know I said that one of the benefits of recording your blog post is that you can create content anywhere, but you still need to create this content in a relatively quiet place. If you're trying to record your content outside, next to a construction site, you're going to get a lot of background noise and this is going to interfere with the quality of your recording. In turn, this will affect the overall accuracy rate of the automatic transcription. The clearer the recording, the more accurate the automatic transcription, the less editing time on the back end.
Which leads us nicely on to step 3.
Once you have completed your recording, you need to download your audio file onto your computer/laptop. I recorded this blog post using Voice Memos on my iPhone. Once I was done, I just Air Dropped it to my laptop.
Next, I logged into my Happy Scribe account. Don’t worry if you don’t have an account yet. Just click 'Start Free Trial' to upload your first file for free.

From there, follow the very intuitive step-by-step process to upload your file. I had to answer a few short questions, but this didn’t take but a minute.

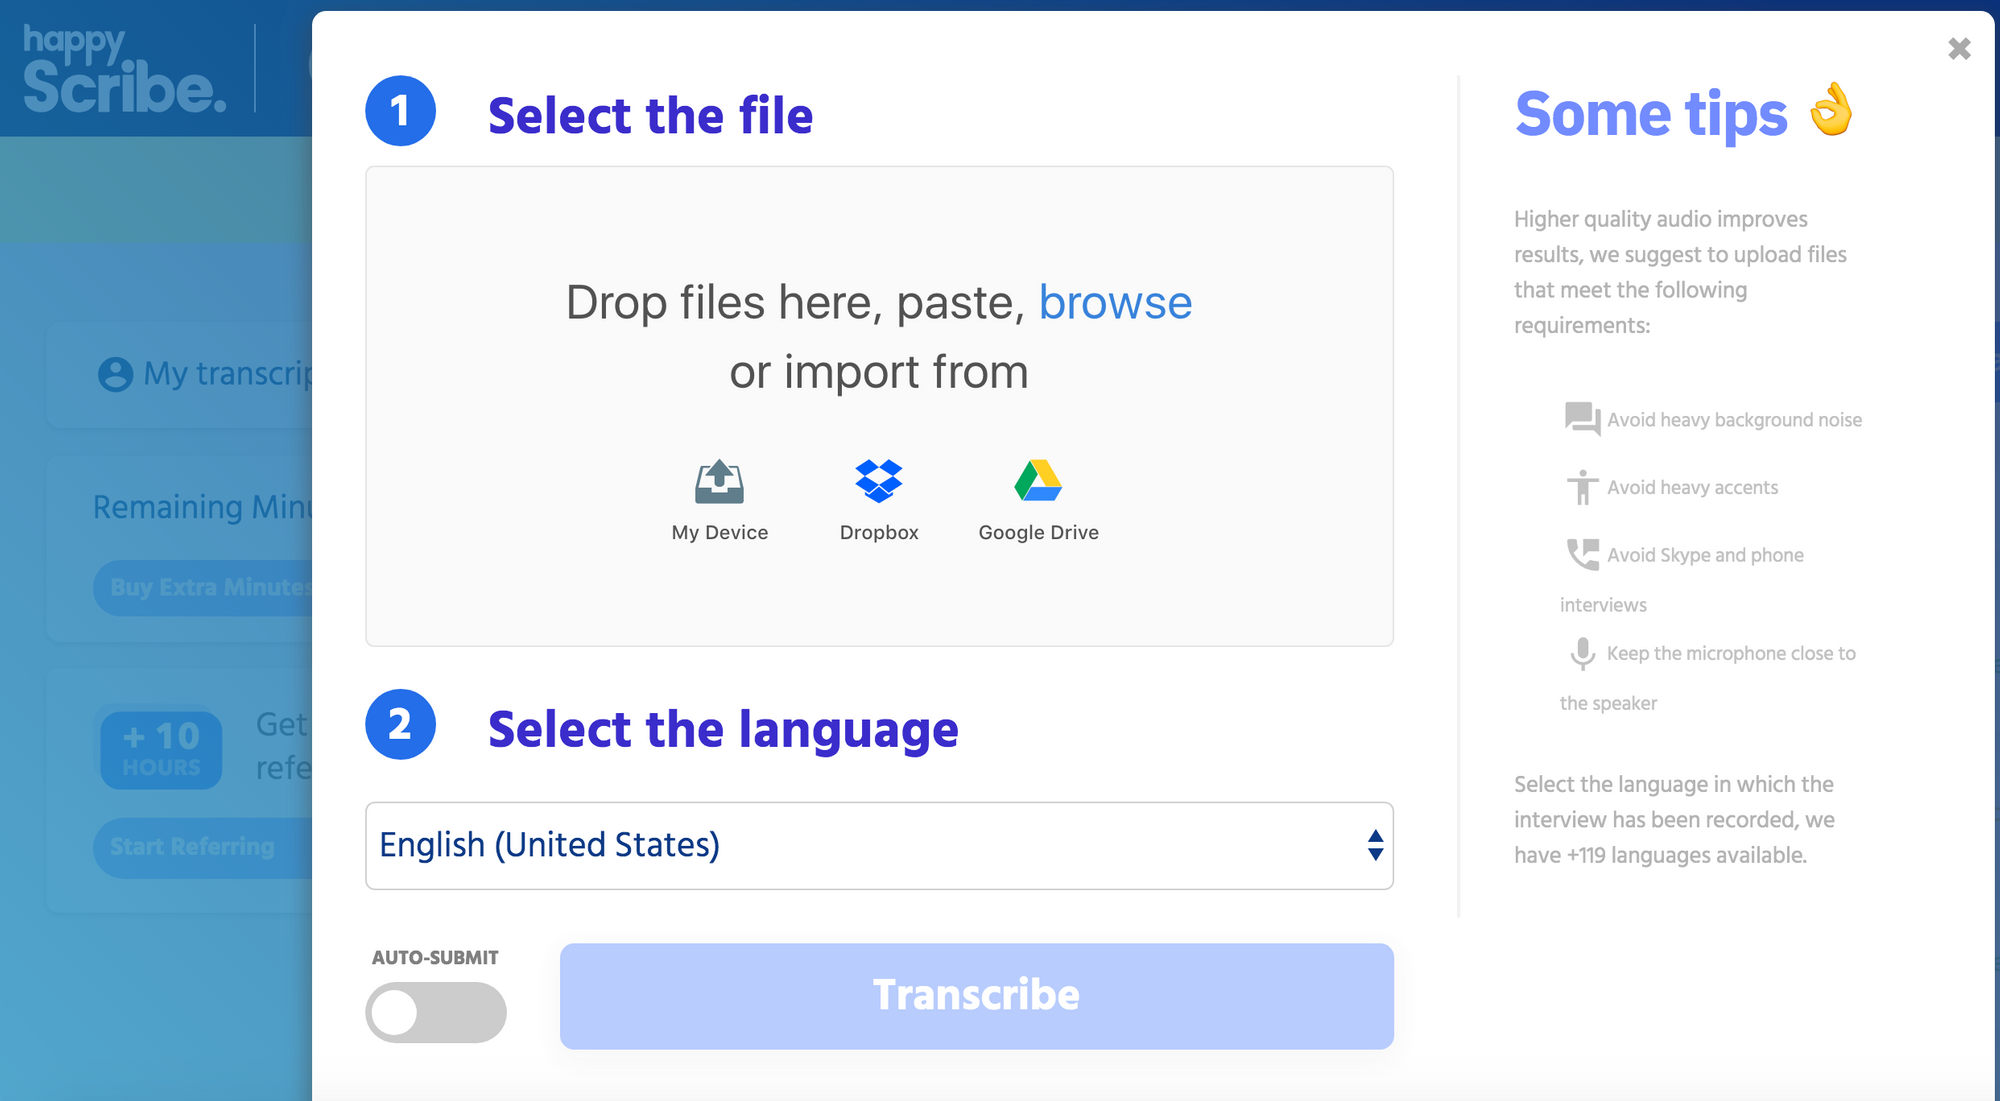
You then hit Transcribe and you wait for your file to upload. My 6.39 minute recording took less than two minutes to upload. During that time, you can go off and go do something you want to do. Go grab a coffee. Call your mom. Check your Facebook.
In just a few short minutes, your whole audio recording will be converted to a text file on screen, ready for your to review.
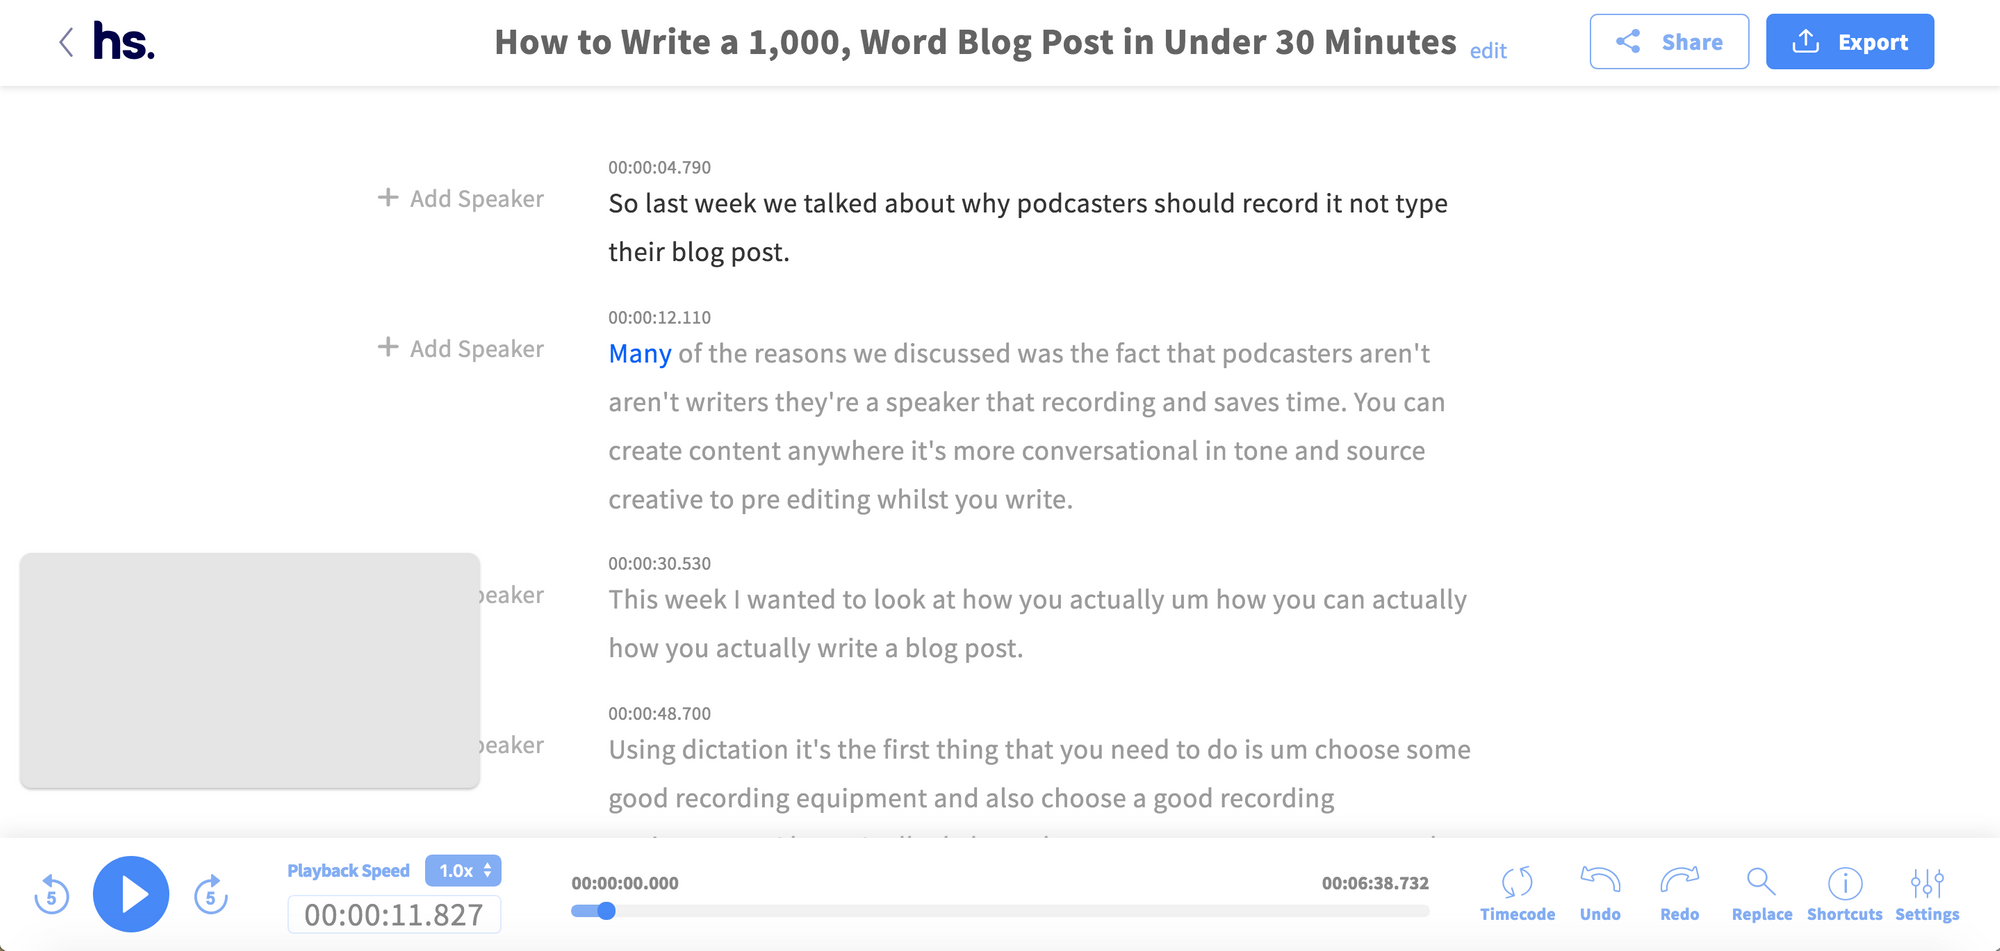
At this stage you can re-listen to the recording and as the audio file plays, the text words are highlighted. This gives you a chance to edit any small errors between the audio and text file. For the record, my recording had very few!
When you are ready, you can export the text you see in the Happy Scribe platform as a Word Document file or any other of number of formats that you choose.
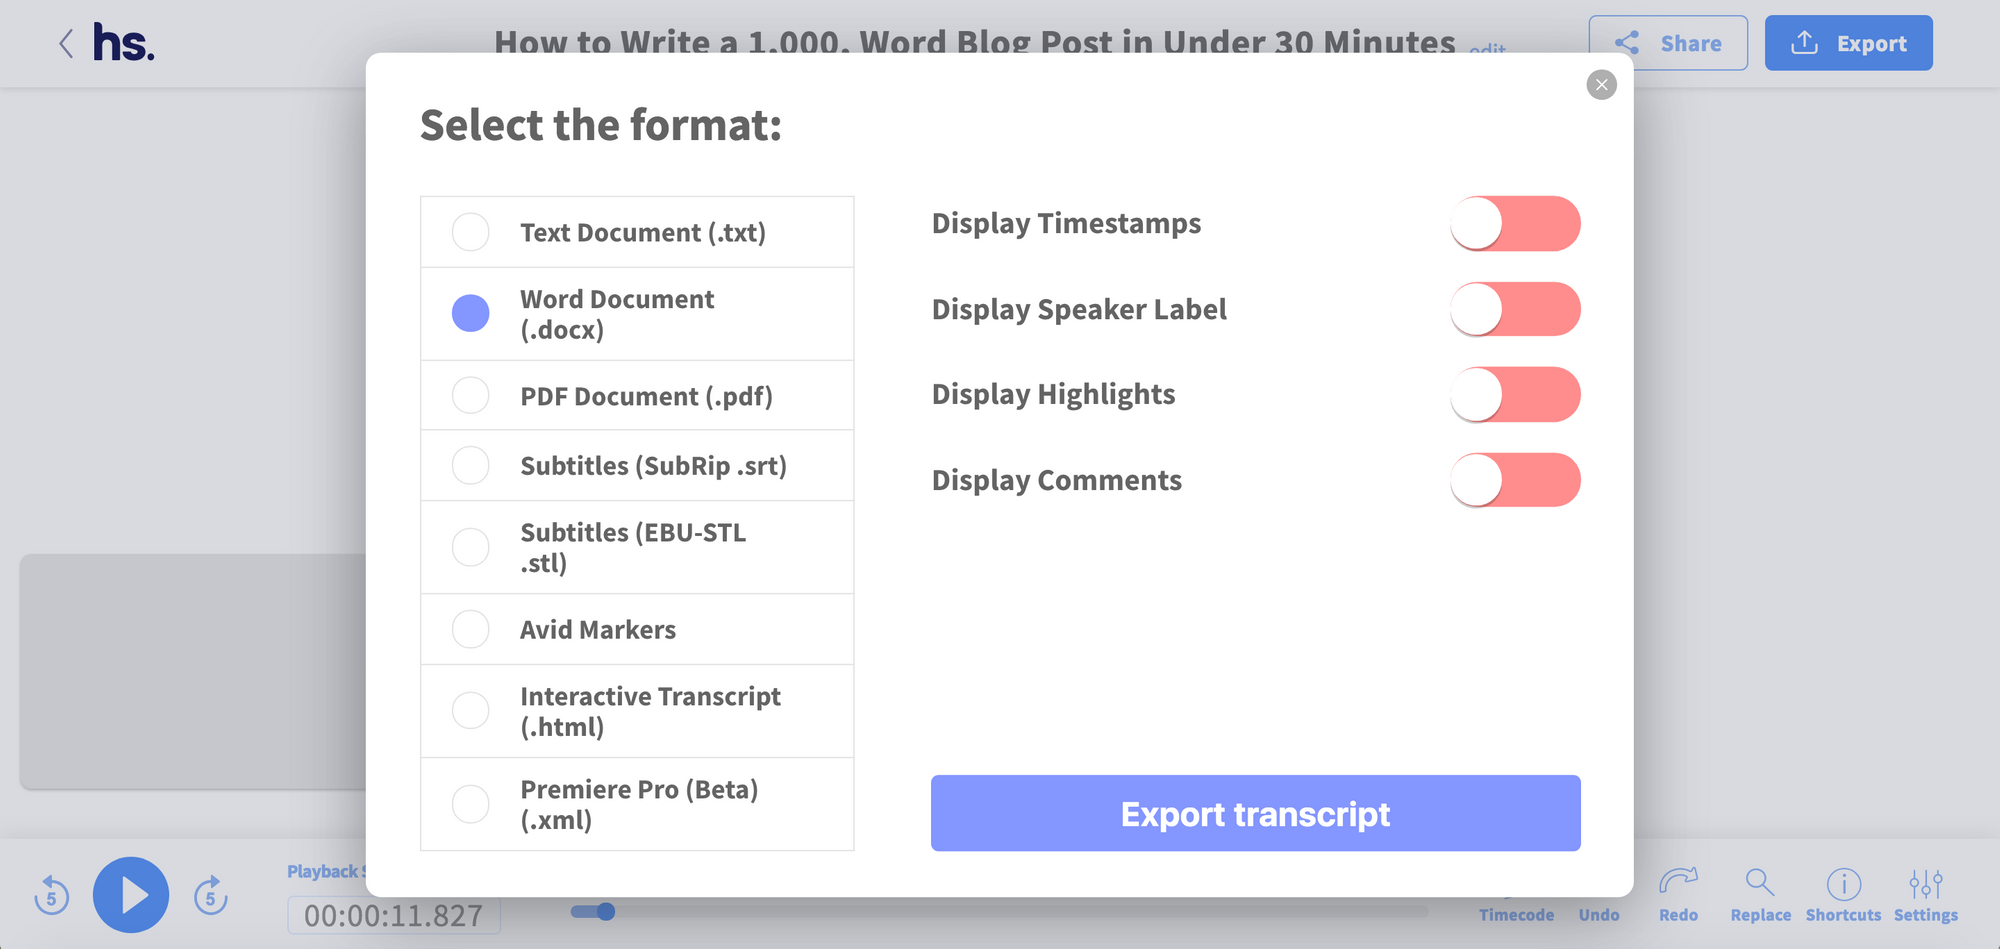
Once the text is in the Word/Pages document file you can make any final editing adjustments required.
For example, for this blog post, I changed some of the paragraph breaks and I added in the bolded subheadings. I expanded on a few ideas and I inserted some factual information I needed to research. However, my overall editing was pretty minimal given that automatic transcription accuracy rate these days is near one hundred percent.
So it's pretty simple.
That brings us to the last step: formatting and publishing.
Once you are fairly happy with the editing in your Word document, you then just need to copy and paste the final text into your WordPress site or whatever other web-hosting site that you use. Format the headings to your standard style. Insert the necessary backlinks and social media plug-ins. Highlight your keywords. Write your excerpt. And include a picture if you want. Then all you have to do is push publish.
It is as simple as that.
Today I used the recording method to ‘write’ my blog post. I followed these exact steps. My recording took 6.39 minutes. I spent another 3 minutes air dropping the audio file to my computer, uploading to Happy Scribe, and waiting for the text to be returned to me.
I got back a 1,020 word text file, which, in fairness, I spent around 30 minutes editing. However, I found that once my main ideas were out of my head and on to the page, I wanted to expand on them more, which increased my editing time. I’m assuming most podcasters, that are better at speaking their thoughts, can do the editing step in much less time because they would have spoken their ideas better to begin with.
Then I just needed another 5 minutes to format and publish. So in total, I probably spent a little over an hour on writing this blog post. Shh…don’t tell my employer!
Normally the full process of writing a blog post, like this one, takes me around 5 to 6 hours. So definitely, this method is much faster. It did also feel much easier.
Now that we’ve talked about the benefits and showed you how to write your blog post by recording, maybe you will consider using this method in the future. I hope this has been helpful for you. If you've got any other ingenious ways to write a blog post quicker drop us an email. We'd love to hear from you!
And if you need some help transcribing your podcast recordings to text, let us know. We are always HAPPY to help.
Five important software tools for podcasters.

How can you help your podcast get discovered? How can you get more viewers to listen to your podcast? How can you differentiate your podcast from someone else’s on the same topic? One solution is to include an interactive transcript.
Podcasters should record their blog posts instead of writing them. This method of converting blog posts from audio to text has many advantages. Here's why.
If you want your podcast to reach the widest possible audience, you also need text content. With Happy Scribe's automated transcription tool, you can turn a podcast into a blogpost with minimal effort.
Podcasts are the modern radio, in fact, better. They offer on-demand shows, free information and present huge marketing opportunities beneficial to both advertisers and viewers. Optimal use of SEO for the same can result in significant gains for any business [1]. What is search-engine optimization (SEO)? To understand the concept
We’ve reviewed dozens of productivity tools on the market and provide you with our list of the most essential productivity tools for podcasters.
This week we provide you with a step-by-step guide on how to write a 1,000-word blog post in under 30 minutes by recording instead of typing.
Hello 👋 Over the past two weeks, we have spent time calling some of you. We have been amazed by the diversity of content that you create and we love the idea that Happy Scribe can help you to produce it. Starting this month, we would like to share with you
Creating a money-generating eBook from your existing podcast episodes shouldn’t take too long. Just follow these six simple steps.
This guide outlines the key steps to launch a successful podcast. It covers topics such as choosing a niche, purchasing equipment, recording and editing, creating engaging content, promoting your podcast, and monetizing it. Whether you're a beginner or have some experience, this guide has you covered. Happy podcasting!